A Month with the Printrbot Simple Metal 3D Printer
Over the last month I’ve had the opportunity to borrow/rent a 3D printer from a friend of mine. This was a healthy thing for me, since I had recently joined a local hackerspace (Brainsilo) to have access to a 3D printer a member kept there. With all the hype and excitement around 3d printing, I quickly got caught up in the possibilities and was overwhelmed with all the amazing things I could now potentially create, either of my own design or from sites like Thingiverse.
Having to actually go to Brainsilo to kick off prints was just inconvenient enough, and my ethusiasm just manic enough, that I started to seriously consider buying a printer of my own. Based on my research, one of the best values in 3d printing appeared to be the Printrbot Simple Metal, which you can buy for $539 in kit form or $599 assembled (plus shipping). Thankfully before I gave in to the desire to impulse-buy one of these, I worked out an arrangement to borrow this same model from a friend of mine who was starting to get a bit bored with it. In the end I worked through my obsession and gained more realistic expectations about what 3d printing could offer me.
I’ll reveal the conclusions now: it’s not useful enough for me at this time, but may be worth re-examining what options are out there in another year or so. But I will also say that the Simple Metal does live up to being one of the best value printers you can get for under $1k – I advise getting the heated bed accessory for it (another $100) and setting up an Octoprint networked print server.
My hope was to be able to use this printer to create useful things. A lot of people seem to use them for creating figurines and toys, but I wanted to build enclosures for various embedded boards I had (especially the RaspberryPi). I was disappointed with the results in a number of ways. First of all, printing anything thin-walled or with narrow standoffs wasn’t working for me, because it turns out that PLA is too brittle. Nearly all of the RasPi cases I tried printing fell victim to something snapping or cracking as I tried to fit the board into the case.

RaspberryPi Cases with Broken Parts
The solution here is likely to print with ABS plastic instead of PLA. That requires a heated bed, and the fumes of ABS are not something I wanted to deal with in my home office setup. Another issue which I assume would have been resolved with a heated bed was warping. I saw a lot of warping of anything that had a large surface area (especially embedded board cases). Printing with a brim mitigated this slightly, but still not enough. Printing with a raft fixed the warping issues, but as much as I tried to tweak the raft settings in Cura, the raft was always too strong and more or less ruined my prints when I tried to remove it.
3d printing is still pretty far from a simple usability experience. You have to learn the nuances of your printer, slicer, and even tweak print settings for every kind of filament you’re using. Hmmm….can I get away with printing this without support structures? Often you’ll waste hours trying a print without them and end up throwing it away. The process is quite tedious and iterations are slow.
I did have a few nice successes in printing, though. This particular RasPi B+ case from Thingiverse came out well (at least, the case doesn’t have any parts broken off of it yet, though I did have to tolerate some warping in the print). I have a solid set of parts to build this bulldozer battle bot. And I had fun with one of my neighbor’s kids building this 3d printed walking robot.
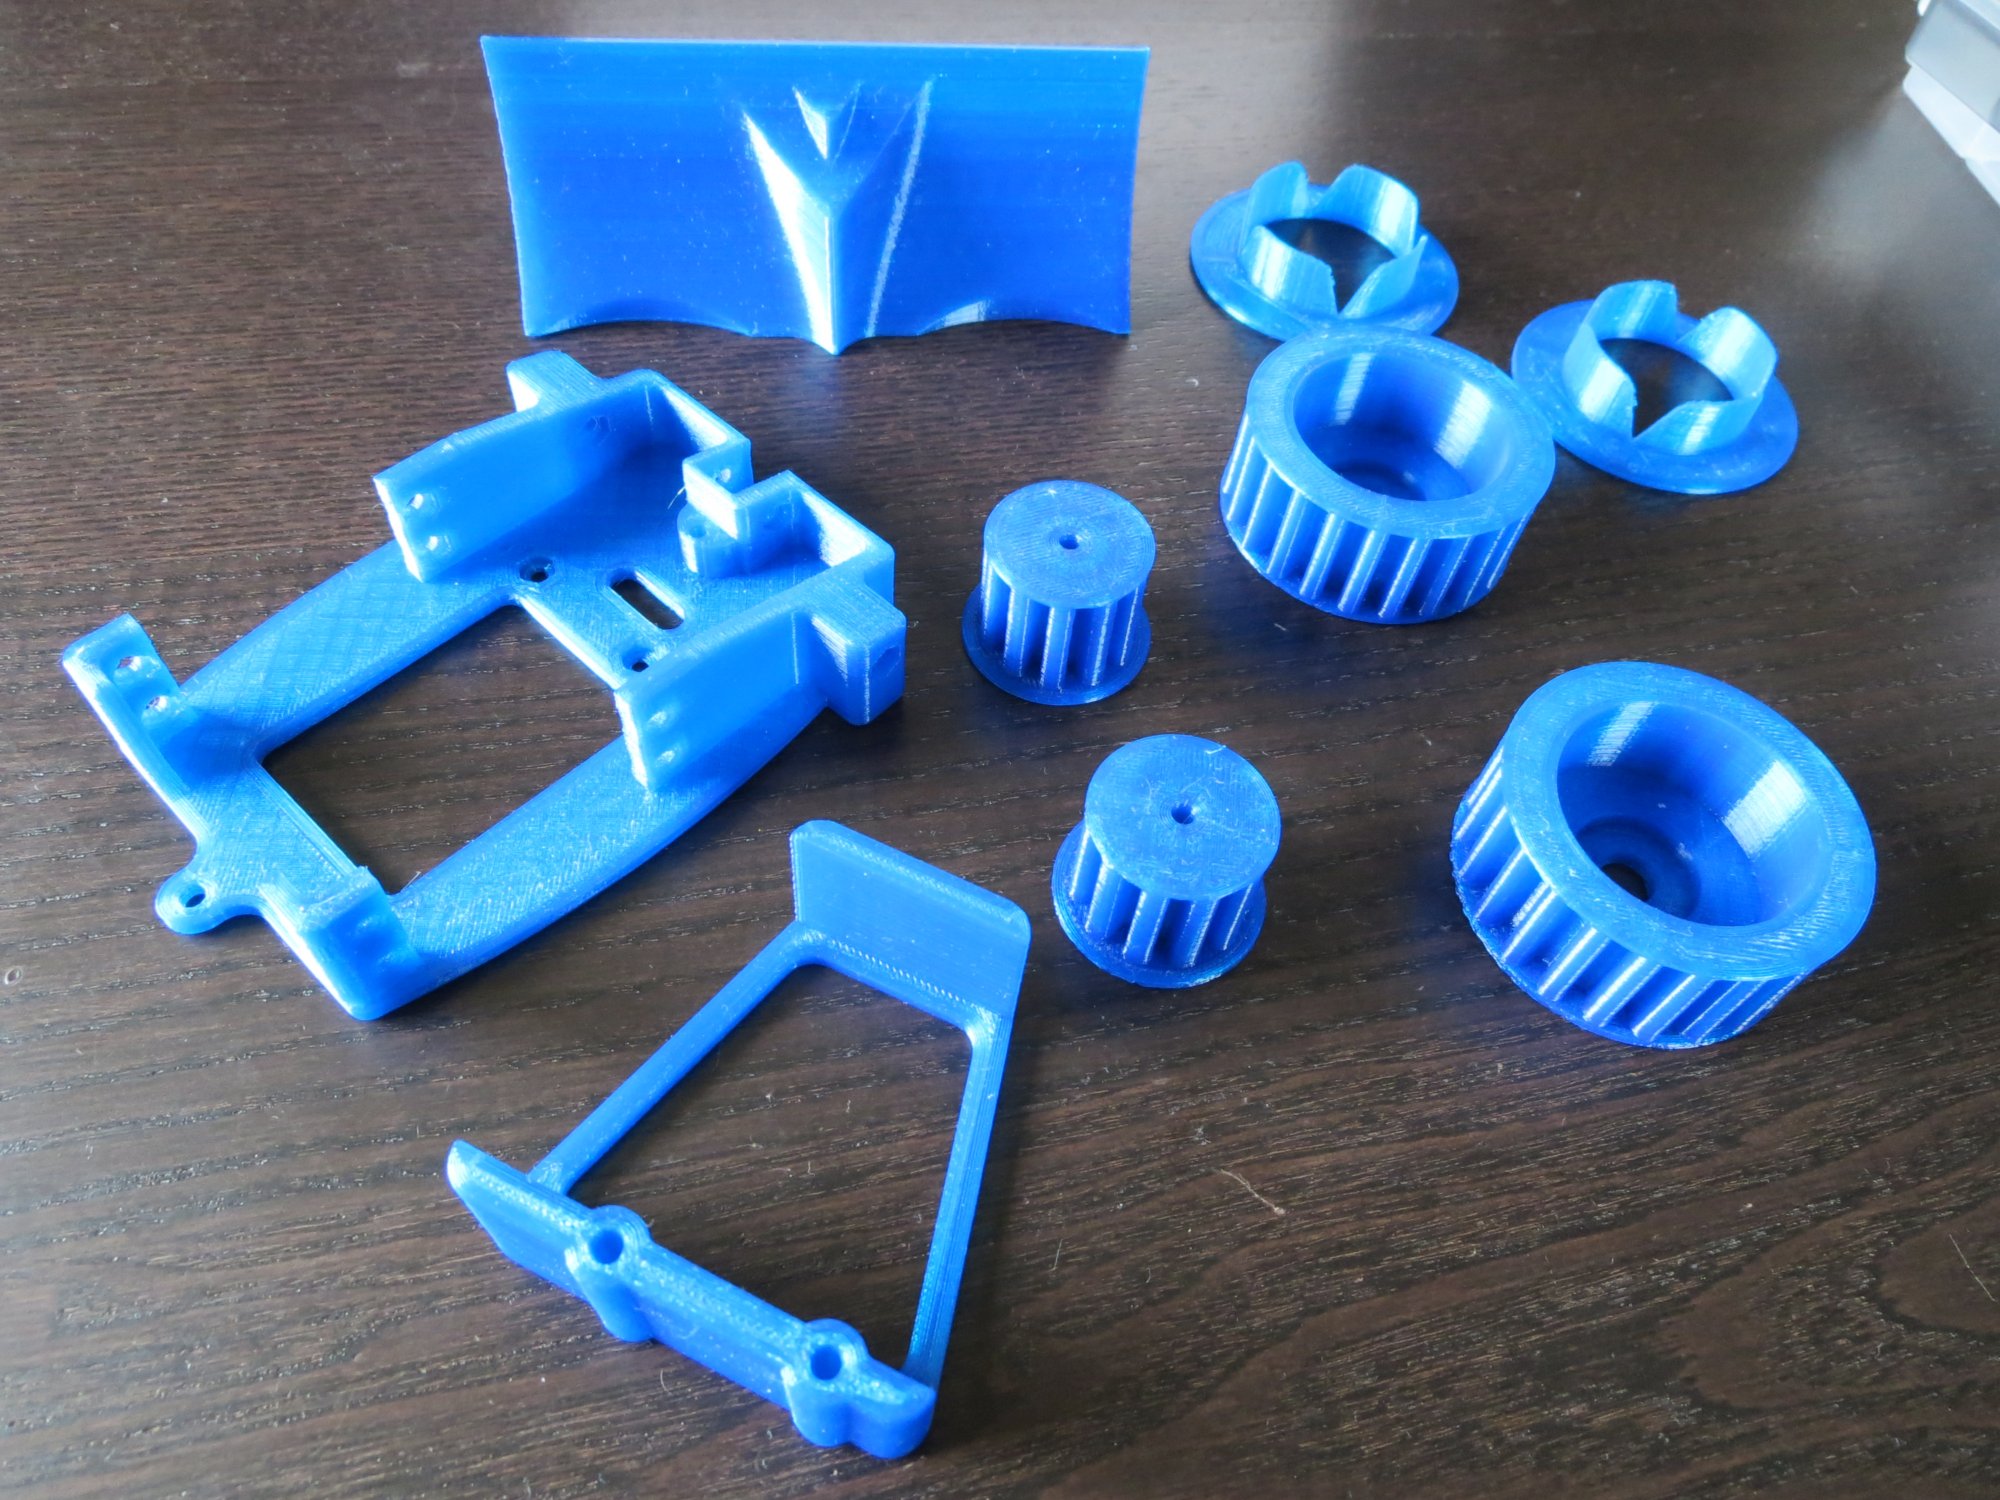
3d Printed Parts to Build a Bulldozer Robot
Overall I’d have to say it’s still worthwhile to wait and see how the technology advances. We’re still in the infancy of 3d printing, and improvements in quality, convenience, and price will be substantial over the next few years. Printing in PLA is mostly useful for toys and prototyping things to eventually make in ABS. Without the ability to print ABS conveniently in my home, I think a 3d printer is still too much of an expensive toy, and if I want a 3d printed item, I’m better off finding a local printer a site like makexyz.com and having them print in ABS and apply the specialized knowledge they have about how to optimize prints with their printer.